Summer Fun - how to make earrings!
In this blog I'm going to demonstrate how to make some earrings in a step-by-step guide. Obviously this is how I make my own earrings and there are many different approaches; and your own earrings should reflect your personal style.
What you will need:
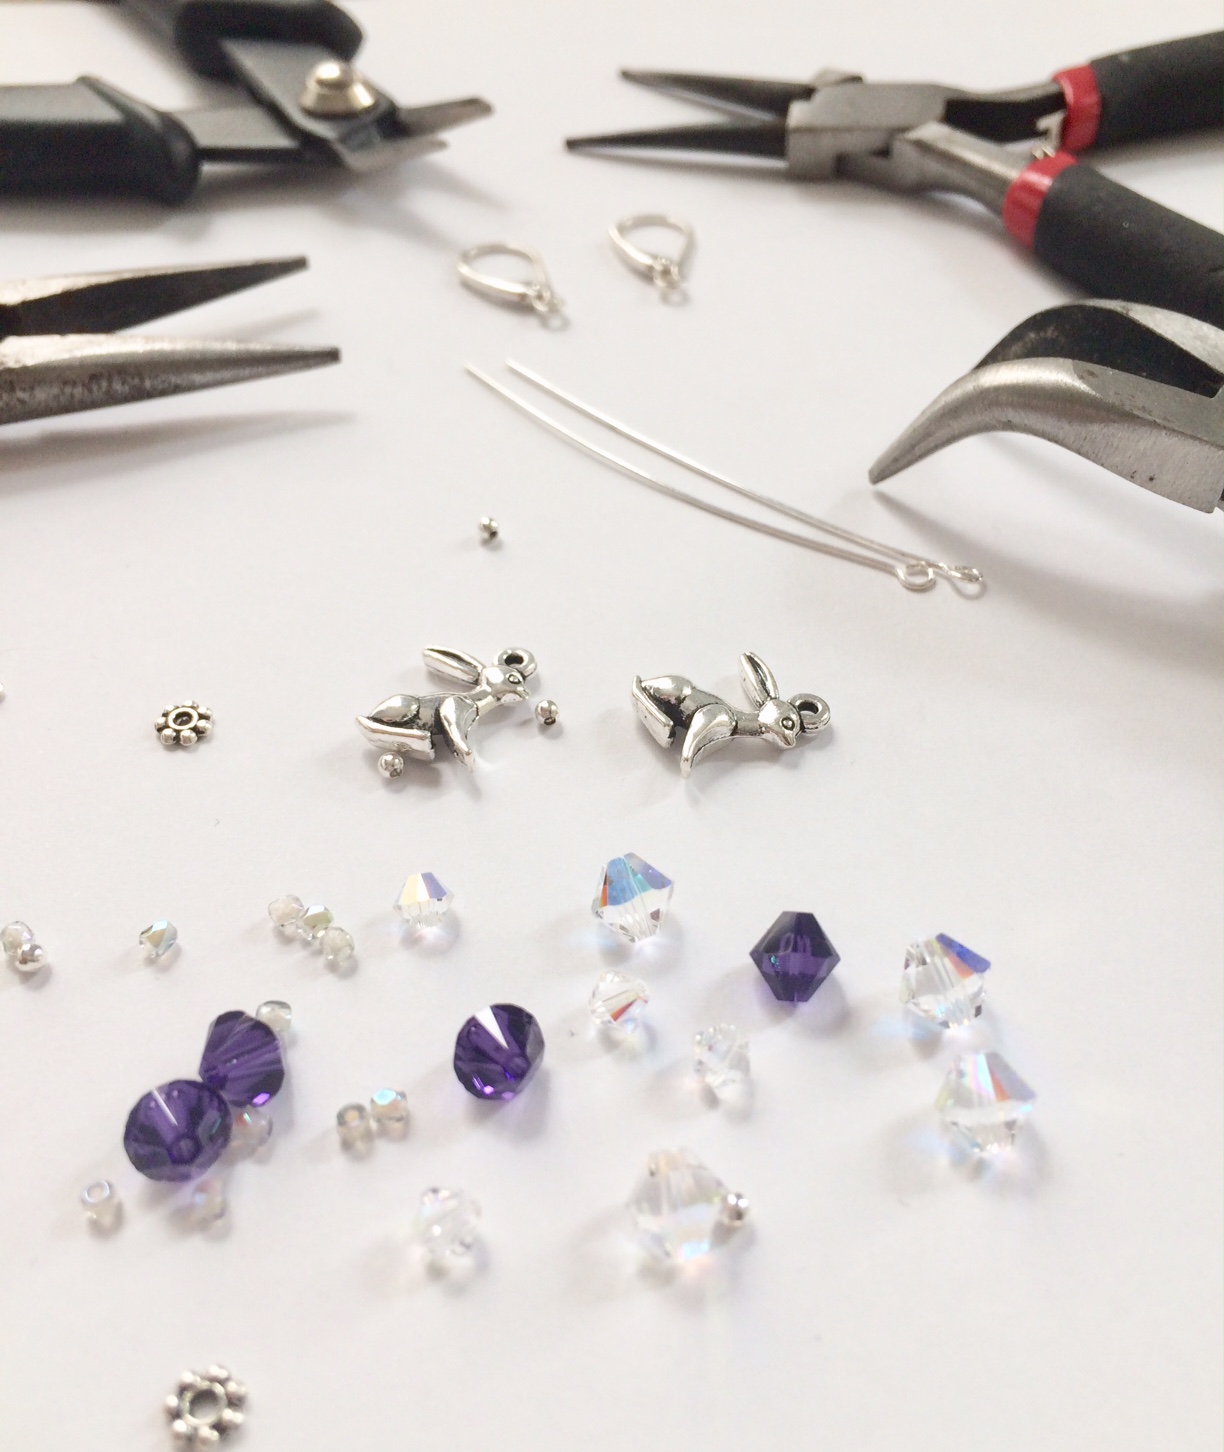
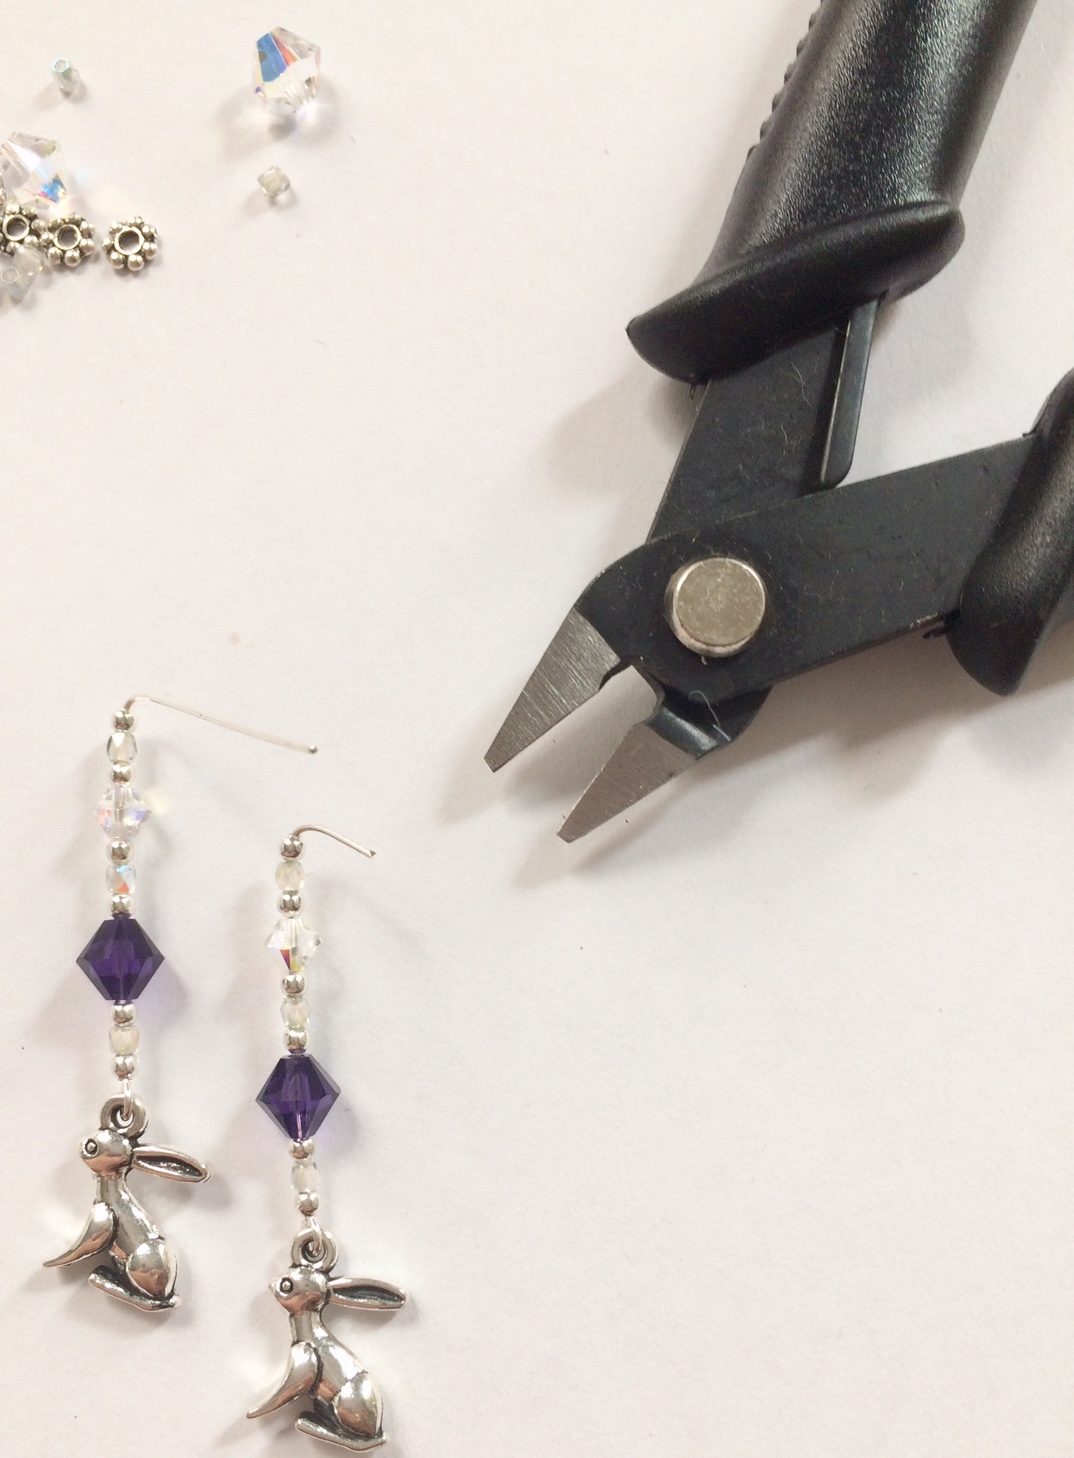
Some tools: wire cutters, round nosed pliers, flat nosed pliers and curved pliers. Ear wires, Eye-pins,
charms, beads and silver findings.

Using the curved pliers, open up the eye-pins and attach the charms. In this case I'm using thin silver plated eye-pins, which bend very easily and are slim enough to thread some very tiny beads. When choosing your charms for earrings it's best to get the 3D ones, so it won't matter if they spin around. I try to avoid using the one-sided charms unless it's a particularly nice one.
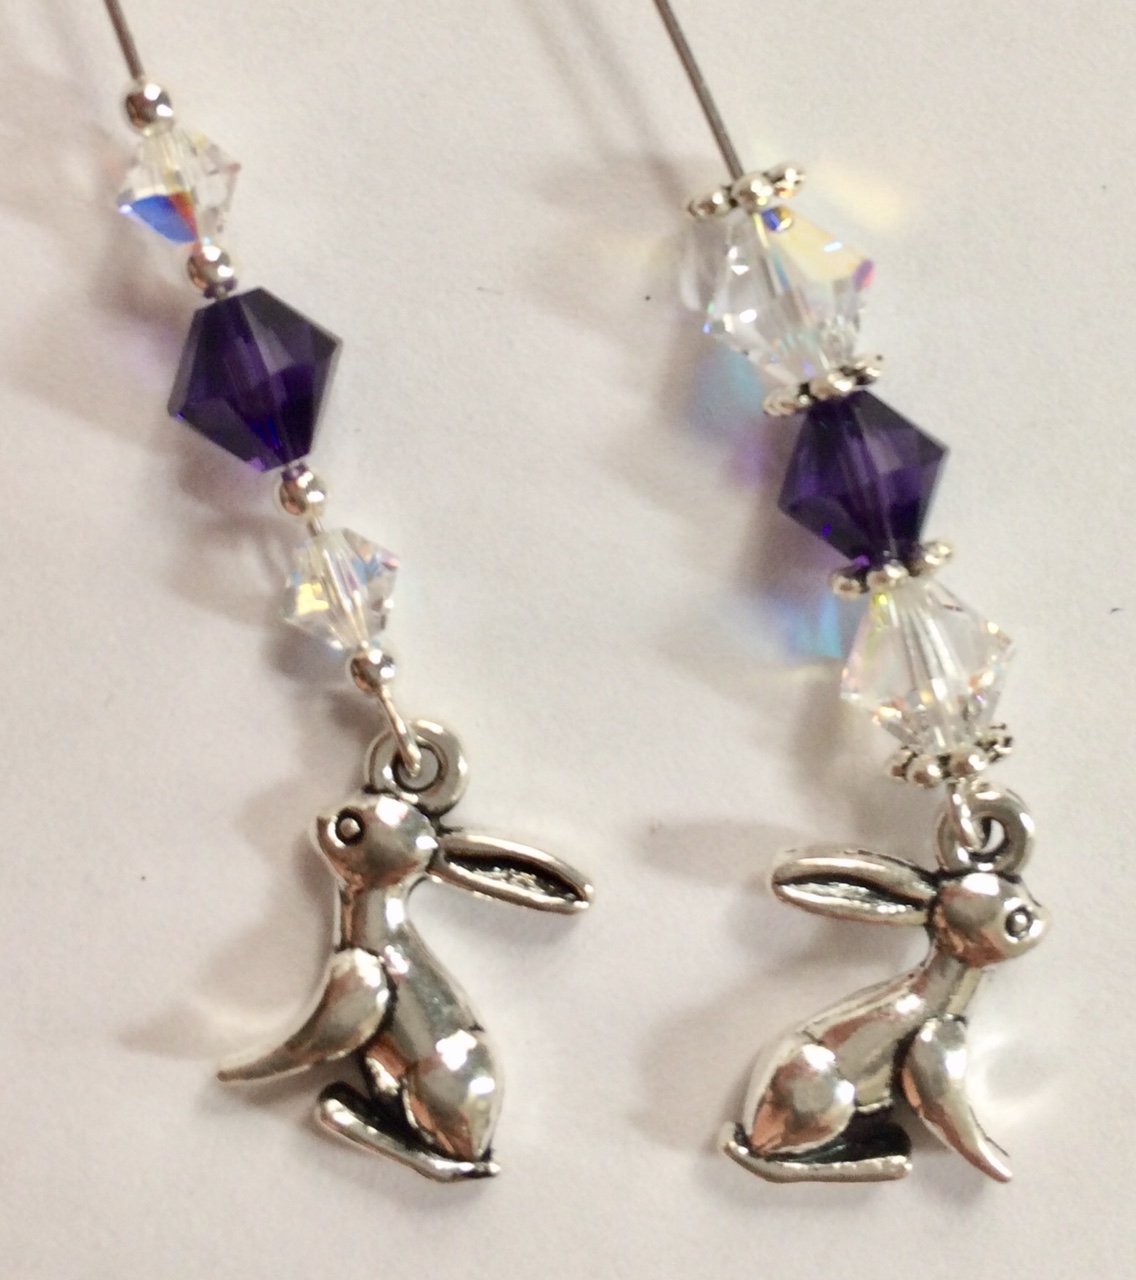
I'm just experimenting with a few different bead combinations here. I'm using Swarovski bicone beads in purple and clear ab; they really shine and gleam much more than regular glass beads - but are also more expensive, so I reserve them for my best earrings.
I liked the long combination on the right, but in my experience a lot of people prefer shorter earrings, so I'm not going to choose this one now. Also I haven't got many of the tiny beads, which are Czech glass; but I have another idea . . .
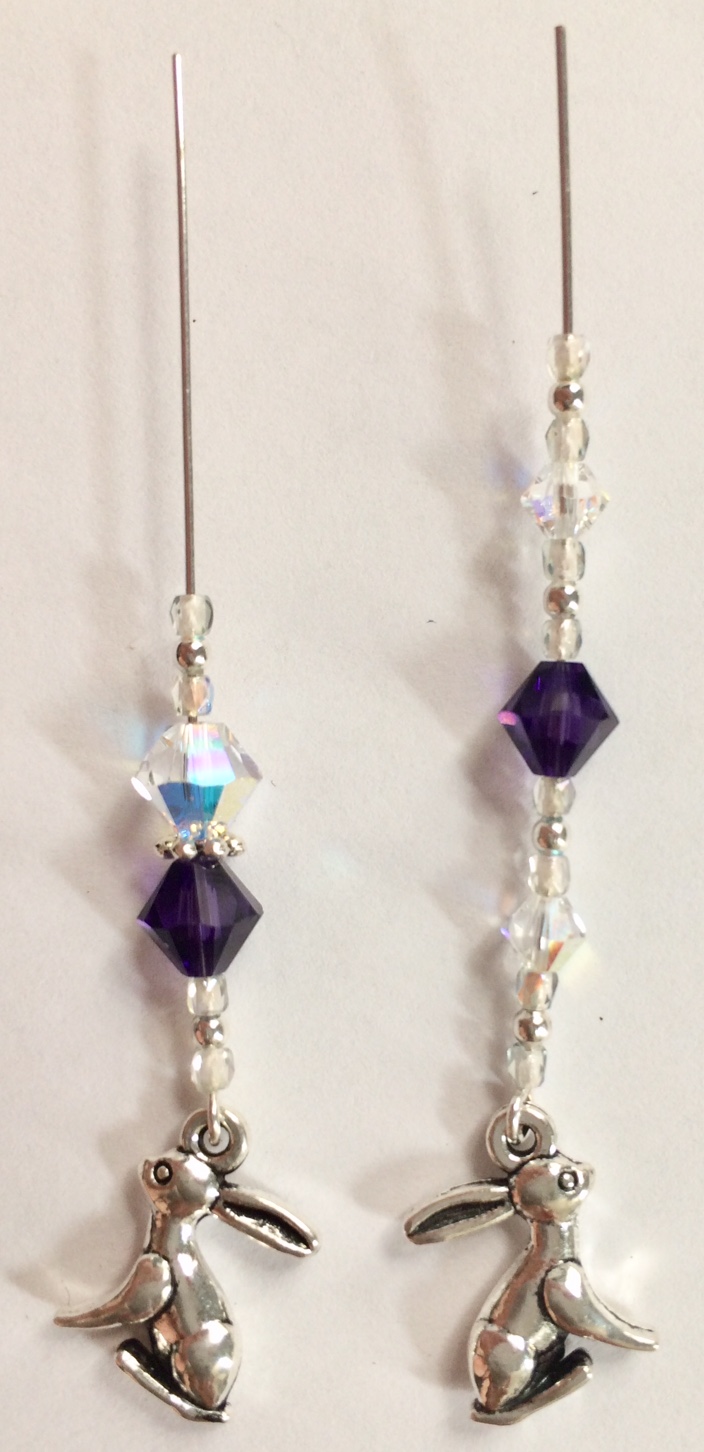
In this pattern I can still use the Czech glass tiny beads, and their delicate shimmer is accentuated by the silver beads. I've kept the large purple Swarovski bead (as that was my intention in the beginning) and used a smaller clear ab bead to add some extra sparkle.
Bend over the top of the eye-pin, so that the beads fit snugly and don't jiggle around too much; then using the wire cutters trim, leaving about a centimetre (as in the earring on the right).
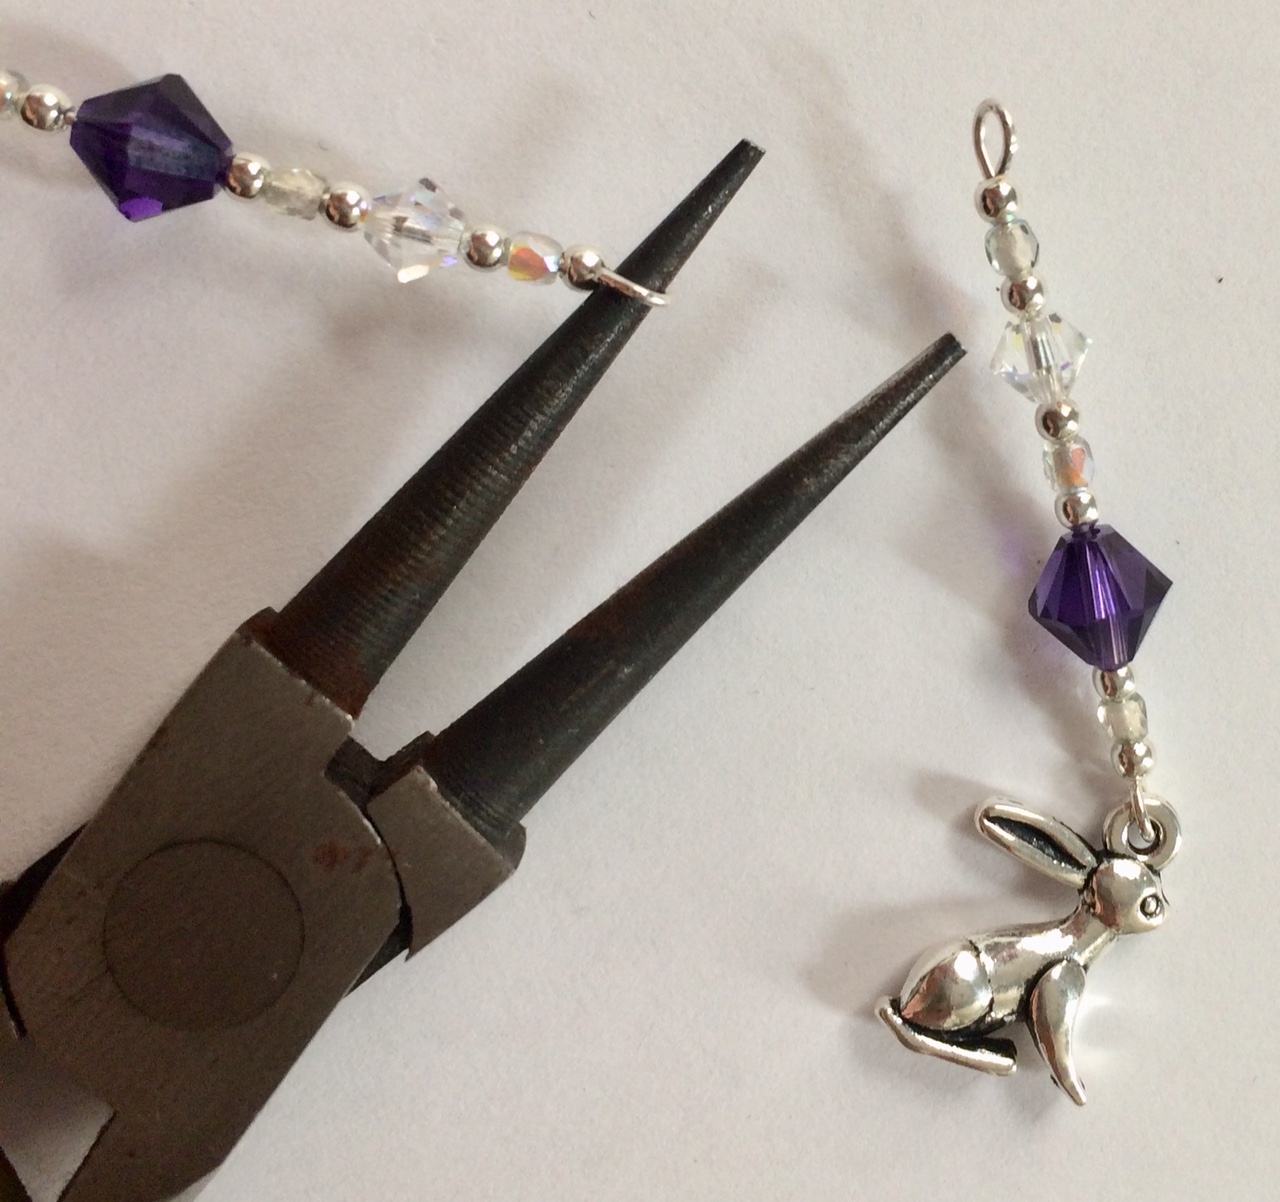
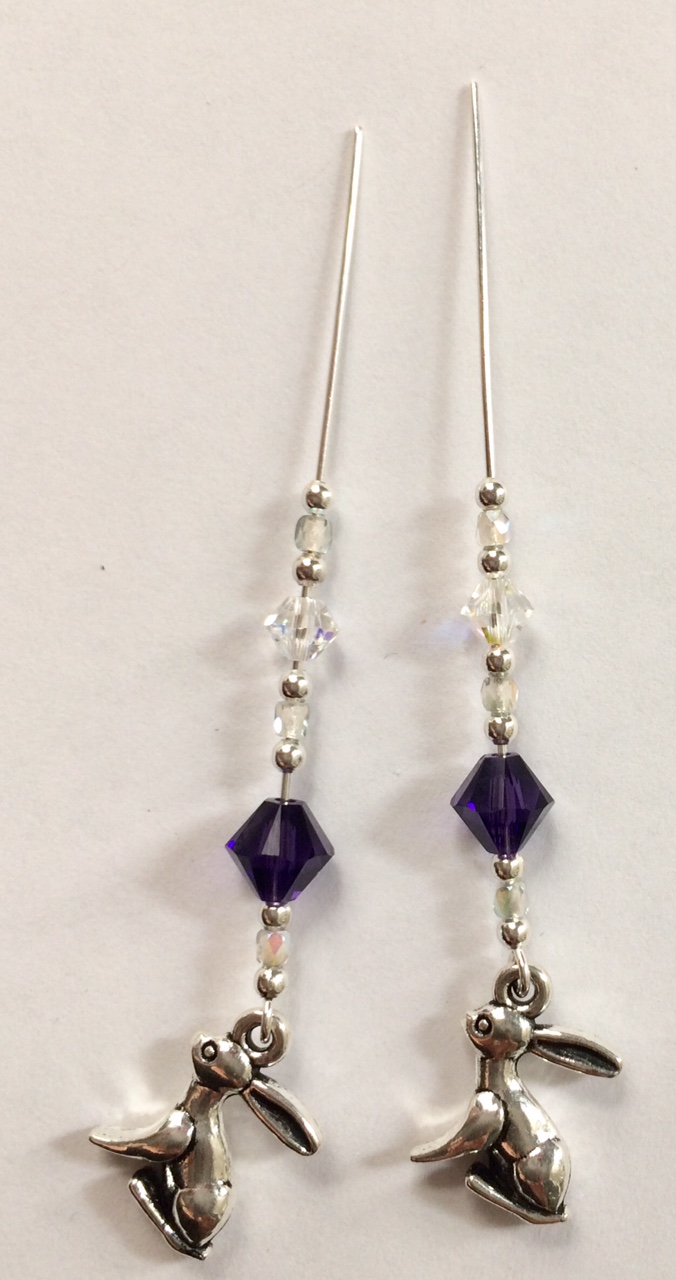
You should practice this next step before trying it for the first time; it's very simple once you get the hang of it, but you can easily ruin your earring and have to start again if you haven't had a trial run. Grab the end of the eye-pin and twist towards you until it joins together. If it doesn't quite meet then use the flat nosed pliers to gently squeeze. Try not to leave a gap, or the earring may fall off of the ear wire. It's true that 'practice makes perfect', as I used to create a variety of odd shapes when I first started making earrings - and I still make the odd mistake!
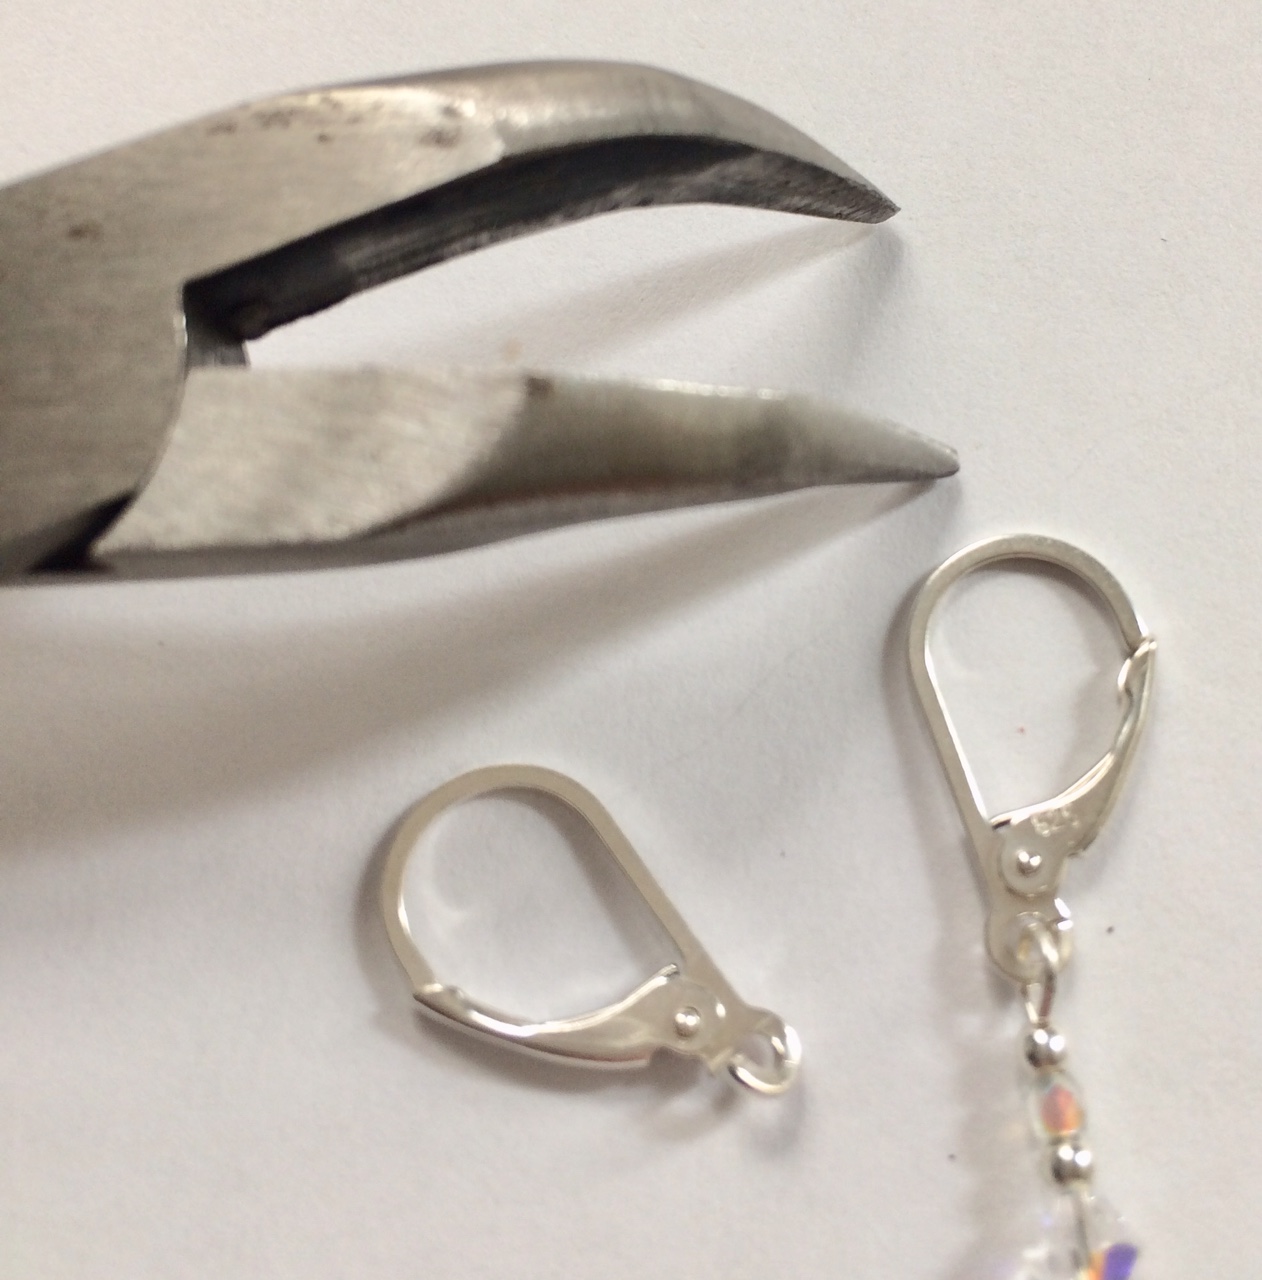
Using the curved pliers, open up the hoop at the bottom of the ear wire. You may choose different ear wires, but the principle is the same. I like these continental sterling silver ear wires as they won't fall out of the ear - and shouldn't cause allergic reactions. But they are quite pricey, so I often use plain ear wires (still sterling silver) that are much cheaper. Again at this stage, check you close the hoop and don't leave a gap. These curved pliers are one of my best finds as they sit perfectly against the wire, bending but at the same time supporting the metal.
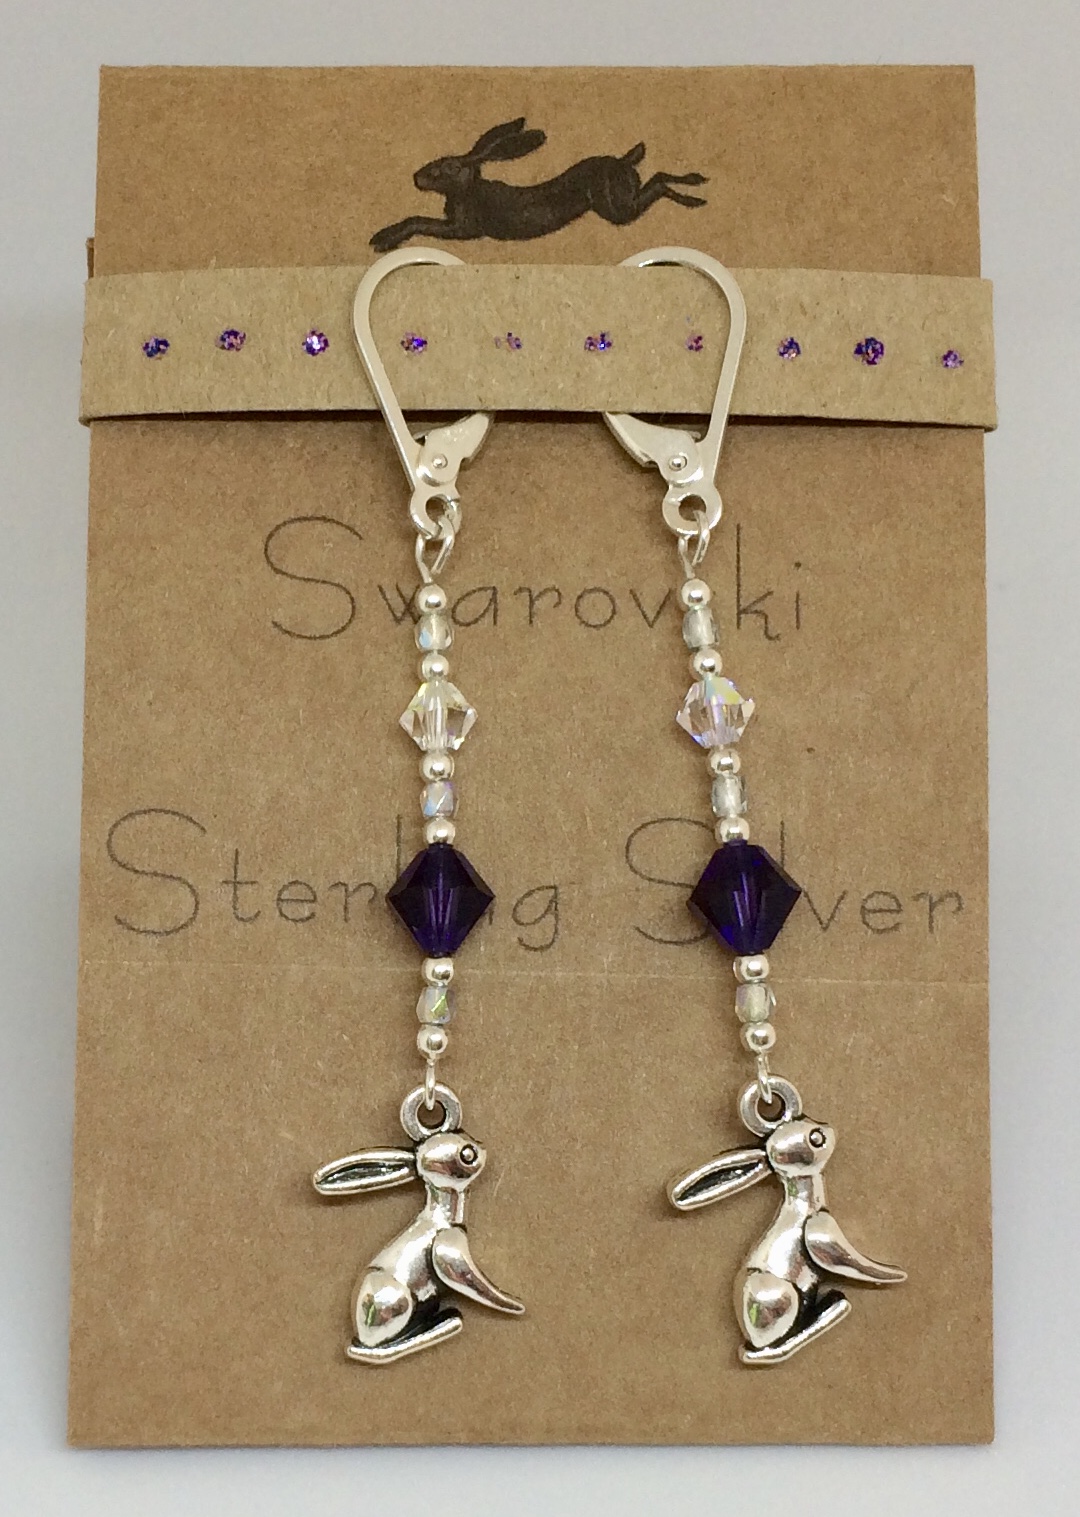
The earrings look particularly good when mounted on cards; I make these myself and although it takes a bit of time and effort, I think display is important if you are selling jewellery.
I hope you have fun making your jewellery! Please leave feedback on my Vikki Yeates illustration facebook page and follow me there to keep up-to-date with my blogs - thanks for reading!
What you will need:

Some tools: wire cutters, round nosed pliers, flat nosed pliers and curved pliers. Ear wires, Eye-pins,
charms, beads and silver findings.

Using the curved pliers, open up the eye-pins and attach the charms. In this case I'm using thin silver plated eye-pins, which bend very easily and are slim enough to thread some very tiny beads. When choosing your charms for earrings it's best to get the 3D ones, so it won't matter if they spin around. I try to avoid using the one-sided charms unless it's a particularly nice one.

I'm just experimenting with a few different bead combinations here. I'm using Swarovski bicone beads in purple and clear ab; they really shine and gleam much more than regular glass beads - but are also more expensive, so I reserve them for my best earrings.

I liked the long combination on the right, but in my experience a lot of people prefer shorter earrings, so I'm not going to choose this one now. Also I haven't got many of the tiny beads, which are Czech glass; but I have another idea . . .

In this pattern I can still use the Czech glass tiny beads, and their delicate shimmer is accentuated by the silver beads. I've kept the large purple Swarovski bead (as that was my intention in the beginning) and used a smaller clear ab bead to add some extra sparkle.

Bend over the top of the eye-pin, so that the beads fit snugly and don't jiggle around too much; then using the wire cutters trim, leaving about a centimetre (as in the earring on the right).

You should practice this next step before trying it for the first time; it's very simple once you get the hang of it, but you can easily ruin your earring and have to start again if you haven't had a trial run. Grab the end of the eye-pin and twist towards you until it joins together. If it doesn't quite meet then use the flat nosed pliers to gently squeeze. Try not to leave a gap, or the earring may fall off of the ear wire. It's true that 'practice makes perfect', as I used to create a variety of odd shapes when I first started making earrings - and I still make the odd mistake!

Using the curved pliers, open up the hoop at the bottom of the ear wire. You may choose different ear wires, but the principle is the same. I like these continental sterling silver ear wires as they won't fall out of the ear - and shouldn't cause allergic reactions. But they are quite pricey, so I often use plain ear wires (still sterling silver) that are much cheaper. Again at this stage, check you close the hoop and don't leave a gap. These curved pliers are one of my best finds as they sit perfectly against the wire, bending but at the same time supporting the metal.

The earrings look particularly good when mounted on cards; I make these myself and although it takes a bit of time and effort, I think display is important if you are selling jewellery.
I hope you have fun making your jewellery! Please leave feedback on my Vikki Yeates illustration facebook page and follow me there to keep up-to-date with my blogs - thanks for reading!